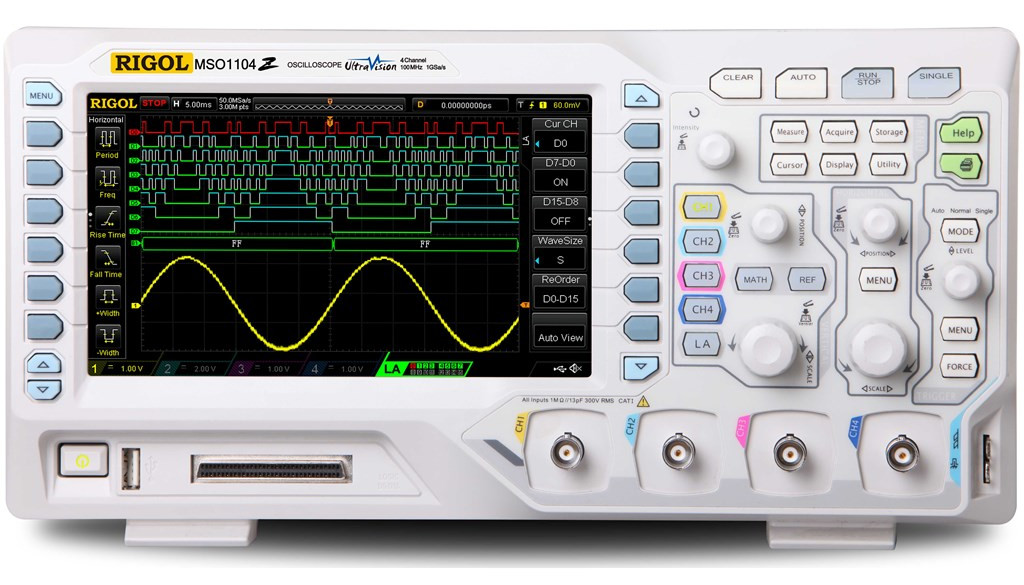
Rigol MSO1104Z Screen Copy

I have owned my Rigol scope for about 5 years now.
And all this time I have had it connected to my network, well only when it is switched on of course.
But I never managed to do anything with the network connection so far.
Obviously this had to change.
What can you do with the ethernet connection.
Well, for starters you can change just about any of its settings.
I find this a bit overkill though, because it is much easier to do that on the machine itself.
Well I could think of situations where it would be nice to select a certain collection of settings with just one push of the button.
However I never ever need that myself.
Taking Pictures

That leaves pulling pictures from the screen.
I can do that using a USB thumb drive, but that is quite a hassle if you need to copy many screenshots across to your computer during a large set of measurements.
It's not that the capacity on modern thumb drives is too limited, after all you can store thousands of images and still have plenty of room left.
No, the problem is that after saving a handfull of pictures, you tend to forget which is which.
You'll have to pull them to the computer as fast as possible to document them.
A small Linux shell script allows me to do that now, without the need of a thumb drive.
Get The Code
I can't check what oscilloscopes all work with this code, but I can only assume that at least most, if not all, Rigol scopes with a network interface will work.
If not, the script may need just a little tweak to make it work for you, hopefully.
Possibly the code may also work with scopes from other brands.
Copy and paste the code below into a text file and place that file in the ~/bin directory.
On most Linux distros this automatically adds the program into the search Path, which makes it easier to execute the code.
I named my script scope.sh, but you can name it anything you like.
# /bin/bash

# This script saves a png of the current contents of the oscilloscope's screen.
# The user can specify a filename. If no filename is specified the program will
# create a hopefully unique one by itself.
#
# The IP address of the oscilloscope has to be assigned to the variable IP.
#
# exit code 1 if filename already exists.
# exit code 2 if no answer is received from the oscilloscope.

IP="10.6.1.160"

if [ "$1" = "-h" ]; then
   # Show help and exit
   echo "Usage: $0 [filename]"
   exit
fi

# The filename is optional
FILENAME="$1"

if [ "$FILENAME" = "" ]; then
   # No filename is given, generate one ourselves
   NOW=$(date +%Y%m%d_%H-%M-%S)
   FILENAME="scope_$NOW.png"
else
   # Otherwise just make sure extension is .png
   FILENAME=${FILENAME%.*}.png
fi

# Check if file already exists
if [ -e $FILENAME ]; then
   echo -e "File $output already exists.\nDelete or move it first.\nAborting!"
   exit 1
fi

# Capture the picture. Strip the 12 byte header from it.
echo ':display:data? ON,0,PNG' | netcat -w 1 $IP 5555 | tail -c +12 > $FILENAME
LENGTH=$(wc -c $FILENAME | awk '{ print $1 }')
if [ $LENGTH -ne 0 ]
then
   echo -e "File saved as $FILENAME.\n"
else
   echo -e "Can't connect to oscilloscope.\n"
   rm $FILENAME
   exit 2
fi
In order to make the script executable you'll have to set the eXecute flag first. This is done with the command chmod u+x ~/bin/scope.sh . And you'll have to change IP address on line 12 to the address of the oscilloscope in your network. Once that is done you can start using the program.
Using The Program
It's easiest to create a directory and cd into it where you want to store your screenshots.
But that is not absolutely necessary, as the program will work in any directory to which you have write access.
Simply start the program with the command scope.sh, and 1 second later you should have taken your first automated screenshot from your scope's display.
As you will see each file name will have a unique filename with the timestamp of the screenshot in it.
This might not be what you want, in which case you can also add a filename behind the command, like so scope.sh screenshot1 .
This will create a file named screenshot1.png .
You may run the risk of wanting to save the file with a name which already exists in the current directory.
The program refuses to overwrite such a file.
So delete the old file and try again, or use a different filename.
Avoid dots and spaces in filenames as they might confuse the program.
If you do want to use spaces, you have to surround the filename in double quotes.
I know, it's only a shell script. It has no fancy user interface, or very sophisticated features, which nobody probably ever uses. It has very rudimentary checks on input errors. But it's functional. It gets the pictures across from my scope to my computer. And that was the whole idea.
Github
This little script is also available on my github account.
