AVR Programmer From Banggood
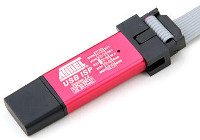
 While browsing the online giftshop/webshop of Banggood I came across this beautiful small AVR programmer.
And like most of the products you find at Banggood this one was ridiculously cheap, delivered.
So I decided I wanted one.
Not that I didn’t have an AVR programmer yet.
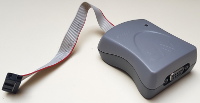
I already had an old original Atmel programmer which connects to an old fashionned serial port.
It simply was time for something new, something modern, something small, something cheap.
I would normally not have written a review about this thing because there’s not much to review about.
It should simply work, and that’s it.
However it turned out that this thing didn’t work.
Like most of the things you buy on Banggood this device didn’t come with a user manual, so I had to figure out how to interface this device from avrdude by myself.
I did manage to find out that I had to tell avrdude that I was using a USBasp programmer, but somehow it still refused to do what it was supposed to do.
 After some Googling I had found out that the firmware in the programmer apparently wasn’t compatible with any programming software known outside of China.
I reflashed the firmware with original USBasp firmware, which is quite easy to do if you have another AVR programmer at hand.
Unfortunately to no avail, it still didn’t work.
That’s when I lost interest in it, for a while.
Just €4 wasted.
Who cares.
Recently I’ve found it again, in a drawer.
Why can’t I get this thing to work?
It shouldn’t be too complicated.
And after some more Googling I found a website explaining what was wrong with the thing.
Apparently the circuit wasn’t exactly compatible with the original design.
There’s one extra wire connecting D- from the USB port to I/O pin PD3 of the ATmega88 inside the programmer.
This wouldn’t have been a problem if that pin was configured as an input.
But since the USBasp firmware configured it as an output it was simply fighting against the USB signal.
Anyway, so far the theory.
I was wondering if the same thing applied to my programmer.
And it seemed to do so, at least the extra connection was there.
So my hopes to get it working were restored again.
References
Here’s a list of websites which helped me to fix my USBasp programmer:
- Original website of the designer of the USBasp programmer, by Thomas Fischl.
- This page describes the problem on V3.00 of the programmer, running on an ATmega8, by Uwezi.
- This page is a follow up for version 3.02 and V4.00, running on an ATmega88, by Uwezi.
- And here’s another page, by Darell Tan, describing the same issue.
Al the credit goes to these guys. I’m just summarizing what I’ve done to fix my programmer, thanks to their excellent guidance.
Versions And Nomenclature
 This programmer does not only come in many different colours, it also comes under various different names printed on the side of it.
Usually USB ISP is printed on the device.
The hardware is almost compatible to the USBasp though.
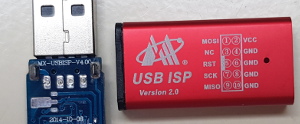
Mine had Version 2.0 printed on the outside, while the PCB inside said it was version MX-USBISP-V4.00.
The websites described above talk about PCB versions 3.00 and 3.02.
Sometimes the printing on the devices even bares the Atmel logo.
Anyway, as far as I can see it (I own only one you know) there are two distinct versions.
The older ones, I think it’s version V3.00 and lower, are running on an ATmega 8 processor.
Whereas all the newer versions appear to run on an ATmega 88.
Mine has version V4.00 and runs on an ATmega 88.
Opening The Programmer
 Opening the programmer is quite easy.
Simply push the housing down over the USB connector and slide it all the way off.
Assembling it agin is simply done in the reverse order. No special tools or skills required.
And in case you don't remember which way was up, simply look at the LEDs next to the crystal and the little hole in the housing, they should line up.
Solution 1 - Cutting The Extra Trace
Cutting the trace between USB D- to PD3 is a possible solution.
I must admit though that I didn’t try this out myself.
Unfortunately the trace to Pin 1 of the microcontroller (PD3) immediately disappears under the chip, so there’s no telling where it goes.
Therefore the easiest way to cut the trace is to cut pin 1 directly from the chip.
This may be a bit tricky because the pins on the TQFP package are fairly small.
After cutting the pin you’ll still have to flash new firmware into the chip.
You can use the original firmware from Thomas Fischl’s web site.
I would go for the latest version for your type of processor.
 Solution 2 - Flashing Modified Firmware
This is the way in which I’ve fixed my processor.
You can download this modified firmware from Uwezi’s website, either the ATmega8 or ATmega88 version, whatever applies to your programmer.
I’ve taken the liberty to provide the ATmega88 version as download on my website because that's the one which worked for me.
However all the credit for this software goes to Uwezi who has compiled it.
Thanks to the modifications in the firmware you don’t have to change anything on your programmer’s PCB.
Flashing New Firmware
No matter what solution you choose, you still need to flash new firmware into your programmer.
This is quite easy though.
I’m not going to explain to you how to flash software into an Atmel processor.
I think you should know how that is done already when you’ve come this far.
There may be a chicken and egg problem for you though.
You temporarily need another AVR programmer.
If you don’t own one you can borrow one.
If you can’t borrow one you might be better of buying another programmer all together.
 Before you can flash new firmware into your USBasp programmer you should connect the two pads labeled "Up" together.
If that other programmer is not powered, like mine is, you’ll need to connect the USBasp to a USB port, which then powers both programmers.
And if your other programmer does supply power to its target you're good to go as it is.
Don’t forget to disconnect the bridge wire between the two "Up" pads before you close up the USBasp programmer again.
As An Extra Note
 Anyway, I've got the programmer working again.
As a coincidence I had also just finished a small programming adapter, which allows me to program 8 pin and 24 pin DIP Atmel devices, which I happen to have lying around.
It can even program 8 pin PIC processors (wash my mouth with soap).
This programming adapter worked perfectly fine with my old AVR ISP programmer on my ATmega8, ATmega88 and ATtiny13 processors.
However I could only get the ATmega88 to work with my brand new USBasp programmer.
Avrdude kept complaining that the device signature read from the device didn’t match.
And on top of that the device signature read from the device changed every time I tried to program it.
At first I suspected the power supply to be dirty, because that was the only difference between the two setups.
I've even tried a much shorter wire between the programmer and the target system.
Soon I discovered that the USBasp simply was too fast for the default clock speeds of the ATmega8 and ATtiny13.
Apparently the Atmel ISP was simply not fast enough for that to be a problem.
Fortunately the solution is quite simple.
Add a -B 3 parameter to the avrdude command.
Here's an example command to program the slower processors:
avrdude -c usbasp -B 3 -p m8 -U flash:w:targetfile.hex
